Assembling an Iris keyboard
I went looking for a new keyboard for a few reasons. Firstly my previous keyboard was playing up and I couldn’t fix it myself. I’ve found that small adjustments to my working setup have been good at combating RSI and it was time for a change. I also fancied a new electronics project and there was something alluring about mechanical keyboards.
Criteria
I had a reasonable idea of the features that I wanted based on my previous Goldtouch Go and Microsoft Natural keyboards. Using split layouts and adjustable tenting has put my hands, arms, and shoulders in a much more natural resting position. Having the option to also separate the halves and open up my shoulders seemed appealing.
I wanted less keys and a smaller footprint so that my fingers had less distance to travel. I hadn’t used a dedicated number pad for a while and there were also a lot of other keys that I didn’t use. I use the navigation arrow keys a lot but figured that I could adapt to using hjkl in vim. The keys themselves needed to have more travel and a softer bottoming out than all Apple keyboards, but that’s a pretty easy feat.
I wanted to build it from parts, especially if it saved me money. I didn’t want any flashing or glowing LEDs because I think they look tacky (sorry).
Shortlist
I started out looking at the Ergodox because I’d heard of it before and I knew that it met some of my criteria.
I liked the idea of having dedicated thumb keys because your thumbs are stronger than your other fingers and they’re usually under utilised. I also liked the ortholinear layout; keys are aligned horizontally to make it easier for your fingers to travel up and down between rows and staggered vertically to match the different lengths of your fingers.
What I didn’t like was the number of keys. It has loads, more than I could comprehend how to use, and quite a large footprint to accommodate all of them. I’d read several reviews about the placement of the thumb keys being very specific to the size of your hands.
Then I learnt that the Ergodox has inspired a vast number of derivative designs which share some of the same features and introduce some improvements.
One of the first I came across was the Atreus. It has less keys and a smaller footprint than the Ergodox. I wasn’t sure how I’d cope with so many fewer keys, though in hindsight it’d be fine now that I have some experience of using layers. I wasn’t keen on the non-adjustable angle of the split and tenting was out of the question unless I fabricated my own case.
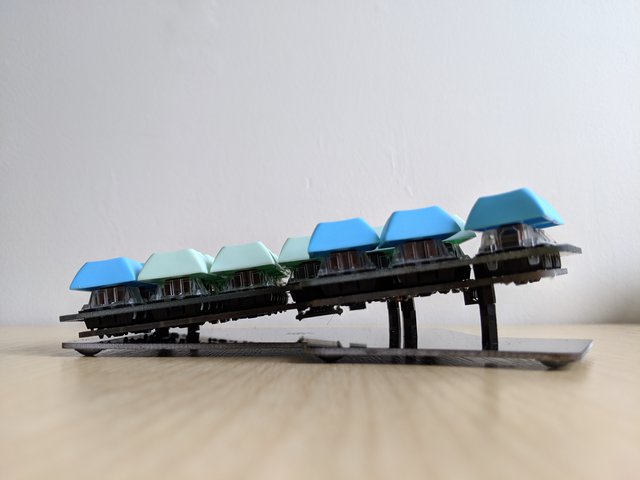
A bit further down the mechanical keyboard rabbit hole I found the Iris. This hit what seemed to be the sweet point, with an adjustable split and options for tenting, an ortholinear layout, a reasonable number of keys, and a good sized thumb cluster. I also liked the simplicity of using PCBs for the case, which reminded me of Boldport and Rakit projects.
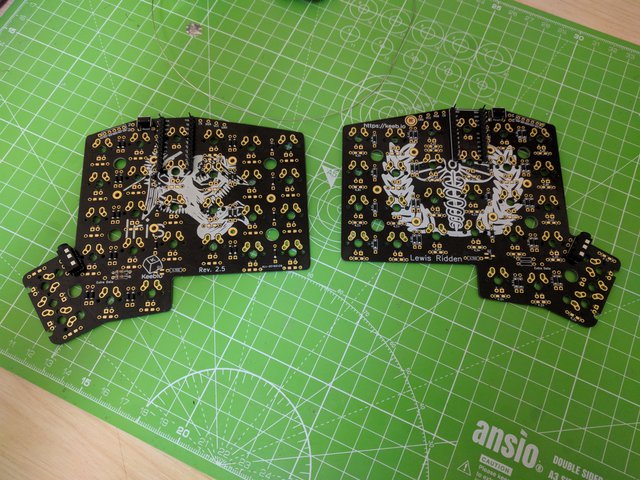
Boards
I ordered the PCBs from the European reseller CandyKeys so that I didn’t have to pay shipping and import taxes from Keebio in the US. All of the other parts were bought from AliExpress because they were cheaper and I didn’t mind waiting for shipping from China. I got spares of most things because the cost was negligible and I didn’t want to wait longer if anything went wrong.
I chose to use surface mount diodes instead of the through-hole diodes that come with the kit because I’ve grown fond of SMD soldering and I couldn’t face manipulating 56 pairs of leads.
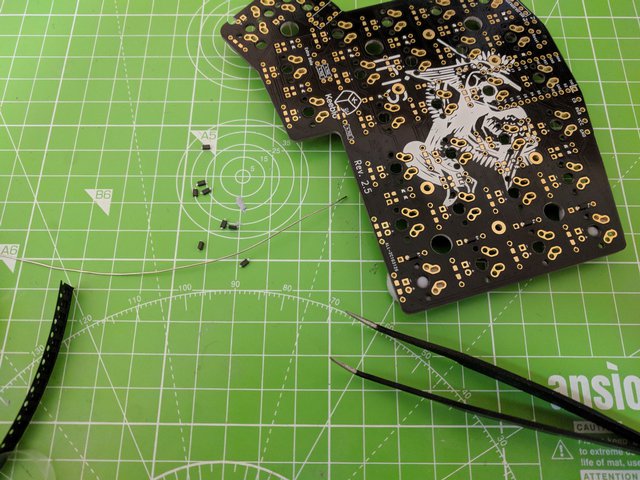
Next I soldered the headers, jacks, and buttons. The later addition of the switches make these joints inaccessible.
Switches
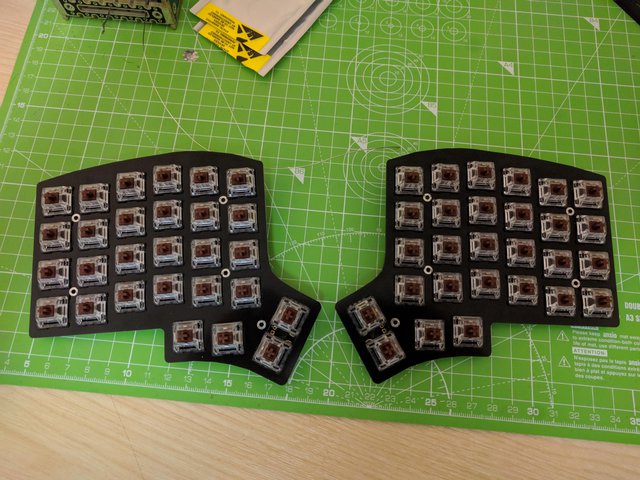
I knew that I wanted switches that gave some feedback, weren’t too stiff, and weren’t obnoxiously loud. I chose Gateron Browns rather than the Cherry equivalent because they were easier to source and some reviews said that they felt smoother. I figured I could always desolder and swap them out if I later changed my mind.
Getting the switches perfectly straight was a bit of a pain. I deliberately bought 5 pin switches and mounted the corners first, but there was a very small amount of play in the switch plate cutouts which required each one to be placed carefully. Maybe this isn’t a problem with other brands of switches.
Controllers
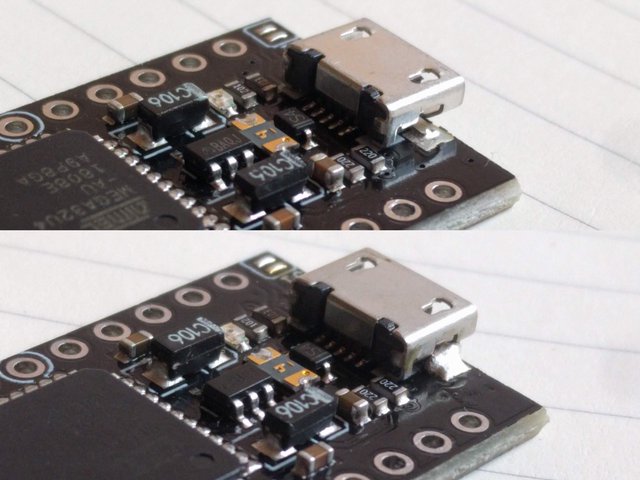
I flashed the Pro Micro controllers beforehand to make sure that they were working. I added some extra solder to the micro USB connectors because they only come with a tiny dab and it’s commonplace for them to rip off when plugging or unplugging the cable.
I removed the plastic spacers from the header pins so that the boards didn’t protrude too much and it would be easier desolder in the event of a failure. Though hopefully this shouldn’t be necessary in the future. I didn’t need to add any insulation underneath because they sat perfectly on top of the plastic pins of the switches.

Tenting
Astute readers might have noticed that I wanted tenting but used the interior screw variations of the plates which don’t support a tenting middle layer. I compromised on this because I preferred the look of the smaller case and had an idea about how I could improvise tenting.
I bought a variety of nylon standoffs which could be stacked and allowed some flex at the joints. After experimenting with the lengths, I managed to get the inside edge raised sufficiently and the outside edge low enough that the plates didn’t touch, so that it matched the angle of my wrists.
I also added some rubber feet underneath so that it didn’t scoot around the desk.
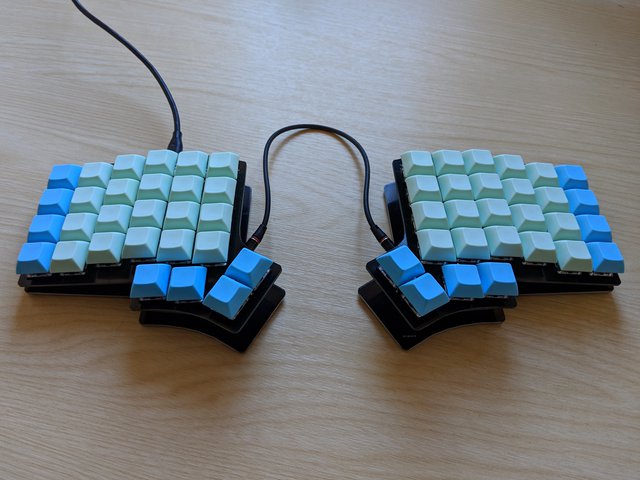
Keycaps
I chose DSA profile keycaps because they were pretty standard looking in terms of height and width. I wanted them made of PBT because I’d read that the texture was harder wearing and less likely to go shiny. Finding keycaps was not easy though; there are so many choices, a lot of which are limited availability, and they don’t come cheap.
I found some blank keycaps that came in a variety of colours, at a good price, and from a seller with good reviews. Using blanks was going to be a bit of a gamble. I could type without looking at the keyboard, but I couldn’t “touch type” using the correct fingers and I was about to learn a completely new layout. I figured it was a good opportunity learn and not being able to look at the keys would help. I could always change the keycaps if it all went wrong.
Typing
Learning to type again was hard. It took about a week to get comfortable with typing alphas and nearly three weeks to get comfortable with punctuation and other symbols. It was a pretty frustrating process, where I felt really constrained, but I’m glad that I stuck it out because it’s really nice to use now.
The exercises at Typing Club were really useful for training muscle memory. They start out slow, focusing on each column and finger, and build up to complete sentences and paragraphs. It was encouraging to see a graph of my WPM rate steadily return to a normal level. Using my pinky finger felt strange and weak at first, like it might cause damage, but now it feels completely natural.
I was worried about whether I’d be able to adapt back to other keyboards after learning the layout. I’ve had no problems using my laptop keyboard when I’m away from my desk, but I can’t touch type with the correct fingers on a non-columnar layout and I don’t use it often enough to warrant learning. I did find that I could no longer use the Goldtouch, which I think is because the keys are smaller.
Keymap
It took a while to settle on a keymap with the right layers and symbols. I felt reluctant to assign or re-assign some keys in case they were hard to learn and unlearn. The best advice I read is to move the keys to where your fingers think they should be, whenever you mistype, rather than attempting to teach your fingers to move. Take full advantage of having a programmable keyboard.
I currently use three layers, with most common symbols on the default layer and momentary layer changes on the thumbs. The second layer has some additional symbols like parenthesis and a number pad which I’m using increasingly more than the top row. The third layer has navigation which allows me to use hjkl in any application, page up and down, home and end, and alt-shifted keys to jump or delete words.
You can see the full keymap here.